สวัสดีครับทุกท่าน วันนี้เรามาลองทำ Segmented แบบ IOS กันครับ โดยจะใช้ Library ชื่อ android segmented control มาเริ่มกันเลยครับ
เริ่มด้วยการ Add Library จาก Maven Central กัน โดยเพิ่ม Code ด้านล่างเข้าไปใน Build.gardle ของ app
compile ‘info.hoang8f:android-segmented:1.0.4’
}
[/xml]
เราจะได้ Build.gradle เป็นแบบนี้
[xml] apply plugin: ‘com.android.application’android {
compileSdkVersion 21
buildToolsVersion "21.1.2"
defaultConfig {
applicationId "com.kamonway.blog_segmented_control"
minSdkVersion 15
targetSdkVersion 21
versionCode 1
versionName "1.0"
}
buildTypes {
release {
minifyEnabled false
proguardFiles getDefaultProguardFile(‘proguard-android.txt’), ‘proguard-rules.pro’
}
}
}
dependencies {
compile fileTree(dir: ‘libs’, include: [‘*.jar’])
compile ‘com.android.support:appcompat-v7:21.0.3’
compile ‘info.hoang8f:android-segmented:1.0.4’
}
[/xml]
จากนั้นกด Sync Now ถ้าไม่มี Error ขึ้นก็โอเคไปกันต่อได้ เมื่อ Add Library แล้วเราก็มาทำส่วนของ Layout กัน โดยแก้ไข activity_main.xml ตามด้านล่าง
[xml title=”activity_main.xml”] <RelativeLayout xmlns:android="http://schemas.android.com/apk/res/android"xmlns:tools="http://schemas.android.com/tools" android:layout_width="match_parent"
android:layout_height="match_parent"
android:paddingLeft="@dimen/activity_horizontal_margin"
android:paddingRight="@dimen/activity_horizontal_margin"
android:paddingTop="@dimen/activity_vertical_margin"
android:paddingBottom="@dimen/activity_vertical_margin"
tools:context=".MainActivity">
<info.hoang8f.android.segmented.SegmentedGroup
android:id="@+id/segmented"
android:layout_width="wrap_content"
android:layout_height="wrap_content"
android:layout_margin="10dp"
android:layout_centerInParent="true"
android:orientation="horizontal">
<RadioButton
android:id="@+id/button1"
android:layout_width="wrap_content"
android:layout_height="wrap_content"
android:text="KamonWay"
android:checked="true"
style="@style/RadioButton" />
<RadioButton
android:id="@+id/button2"
android:layout_width="wrap_content"
android:layout_height="wrap_content"
android:text="The"
style="@style/RadioButton" />
<RadioButton
android:id="@+id/button3"
android:layout_width="wrap_content"
android:layout_height="wrap_content"
android:text="Dev"
style="@style/RadioButton" />
</info.hoang8f.android.segmented.SegmentedGroup>
</RelativeLayout>
[/xml]
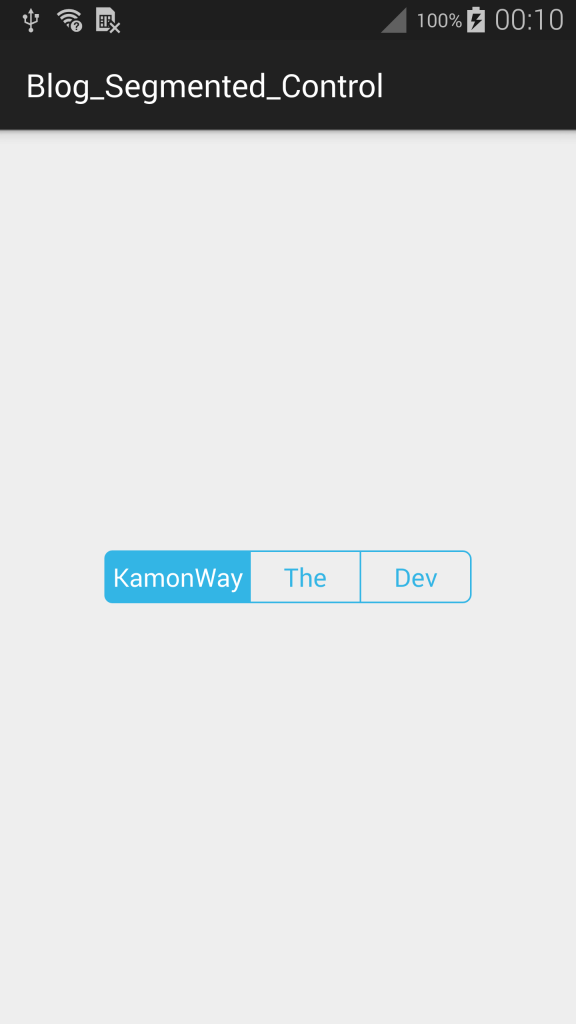
แล้วกด Run จะได้ผลออกมาดังรูป

หลังจากสร้าง Layout กันแล้วเราจะสามารถใช้งาน Segmented ได้ตามปกติ และเช็คค่าจาก RadioBox ได้เหมือน RadioBox ทั่วไป แต่ถ้าเกิดเราอยากเปลี่ยนสีล่ะ จะทำยังไง เรามาดูกันที่ ActivityMain.java ซึ่งวิธีประกาศตัวแปรของ Segmented ตาม Code ด้านล่าง
[/java]
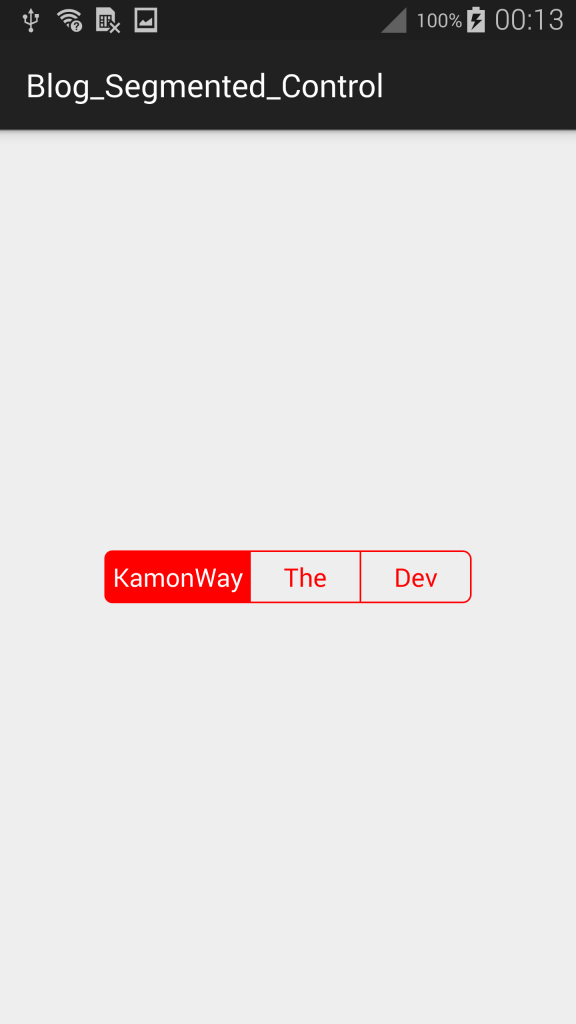
แล้วจากนั้นเราก็กำหนดสีของเส้นขอบและพื้นหลังด้วยคำสั่ง setTintColor แล้วกำหนดสีที่จะให้แสดงเป็น RGB ของผมเป็นสีแดง #FF0000
[java] segmented.setTintColor(Color.parseColor("#FF0000"));[/java]
Code ActivityMain.java แบบเต็ม
[java title=”ActivityMain.java”] import android.graphics.Color;import android.support.v7.app.ActionBarActivity;
import android.os.Bundle;
import android.widget.RadioButton;
import info.hoang8f.android.segmented.SegmentedGroup;
public class MainActivity extends ActionBarActivity {
SegmentedGroup segmented;
RadioButton radio1;
RadioButton radio2;
RadioButton radio3;
@Override
protected void onCreate(Bundle savedInstanceState) {
super.onCreate(savedInstanceState);
setContentView(R.layout.activity_main);
segmented = (SegmentedGroup) findViewById(R.id.segmented);
radio1 = (RadioButton) findViewById(R.id.button1);
radio2 = (RadioButton) findViewById(R.id.button2);
radio3 = (RadioButton) findViewById(R.id.button3);
segmented.setTintColor(Color.parseColor("#FF0000"));
}
}
[/java]
เราจะได้หน้าตาแบบนี้ออกมา
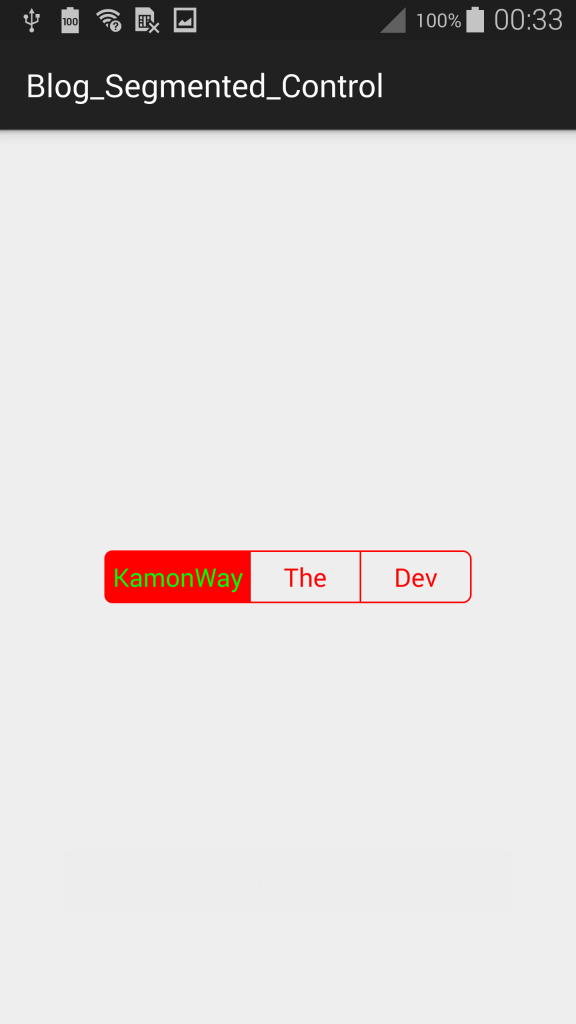
แต่ถ้าเราไม่ชอบสีตัวอักษรตอนกดเลือกเราก็สามารถเปลี่ยนได้ โดยใช้คำสั่ง setTintColor ได้เหมือนกันแต่เพิ่ม Parameter ของสีตัวอักษรเข้าไปอีก 1 ตัว
[java] segmented.setTintColor(Color.parseColor("#FF0000"), Color.parseColor("#00FF00"));[/java]
สุดท้ายเราจะได้แบบนี้ออกมา
Library ตัวนี้ใช้ไม่ยากเลยครับ แค่Add เข้าไปก็แทบจะใช้ได้อยู่แล้ว ลองเอาไปเล่นกันดูนะครับ
[xml title=”activity_main.xml”] <RelativeLayout xmlns:android="http://schemas.android.com/apk/res/android"xmlns:tools="http://schemas.android.com/tools" android:layout_width="match_parent"
android:layout_height="match_parent"
android:paddingLeft="@dimen/activity_horizontal_margin"
android:paddingRight="@dimen/activity_horizontal_margin"
android:paddingTop="@dimen/activity_vertical_margin"
android:paddingBottom="@dimen/activity_vertical_margin"
tools:context=".MainActivity">
<info.hoang8f.android.segmented.SegmentedGroup
android:id="@+id/segmented"
android:layout_width="wrap_content"
android:layout_height="wrap_content"
android:layout_margin="10dp"
android:layout_centerInParent="true"
android:orientation="horizontal">
<RadioButton
android:id="@+id/button1"
android:layout_width="wrap_content"
android:layout_height="wrap_content"
android:text="KamonWay"
android:checked="true"
style="@style/RadioButton" />
<RadioButton
android:id="@+id/button2"
android:layout_width="wrap_content"
android:layout_height="wrap_content"
android:text="The"
style="@style/RadioButton" />
<RadioButton
android:id="@+id/button3"
android:layout_width="wrap_content"
android:layout_height="wrap_content"
android:text="Dev"
style="@style/RadioButton" />
</info.hoang8f.android.segmented.SegmentedGroup>
</RelativeLayout>
[/xml]
[java title=”ActivityMain.java”]
public class MainActivity extends ActionBarActivity {
SegmentedGroup segmented;
RadioButton radio1;
RadioButton radio2;
RadioButton radio3;
@Override
protected void onCreate(Bundle savedInstanceState) {
super.onCreate(savedInstanceState);
setContentView(R.layout.activity_main);
segmented = (SegmentedGroup) findViewById(R.id.segmented);
radio1 = (RadioButton) findViewById(R.id.button1);
radio2 = (RadioButton) findViewById(R.id.button2);
radio3 = (RadioButton) findViewById(R.id.button3);
segmented.setTintColor(Color.parseColor("#FF0000"), Color.parseColor("#00FF00"));
segmented.setOnCheckedChangeListener(new RadioGroup.OnCheckedChangeListener() {
@Override
public void onCheckedChanged(RadioGroup group, int checkedId) {
Toast.makeText(getApplicationContext(),
"Radio1:"+radio1.isChecked()+" Radio2:"+radio2.isChecked()+" Radio3:"+radio3.isChecked(),
Toast.LENGTH_SHORT).show();
}
});
}
}
[/java]


